A Guide to Zendesk Custom Fields for Better Workflows
Discover how Zendesk custom fields transform your support workflow. This guide covers types, automation, and best practices for smarter ticket management.Think of your standard Zendesk ticket as a blank slate. It's functional, sure, but it only holds the most basic information. You get who sent it and what they wrote, but that’s about it. What if you could add your own specific questions to that slate? That’s exactly what Zendesk custom fields let you do.
These fields are your way of adding unique data points to tickets, users, and organizations, capturing the exact information your business needs to operate smoothly.
What Are Zendesk Custom Fields Really For?
Let's stick with that blank slate idea. A standard ticket is like a generic postcard—it gets the core message across, but it lacks specific context. A ticket enhanced with custom fields, on the other hand, is more like a detailed questionnaire you designed yourself. This is the real power of custom fields: they transform Zendesk from a simple ticketing system into a robust data-gathering machine built around your unique workflow.
Instead of your agents having to dig through long email threads to find an order number or product version, you can capture that critical information right from the start. It’s a small change that has a massive ripple effect on your entire support operation.
From Simple Tickets to Smart Data
When you add fields like "Product Type," "Urgency Level," or "Client ID," you’re not just tidying things up. You're building a smarter, more efficient system from the ground up. Collecting specific, structured data upfront unlocks a few game-changing benefits:
- Smarter Ticket Routing: Imagine automatically assigning tickets to the right team based on a custom field. A ticket marked "Billing Issue" can go straight to your finance department without anyone having to lift a finger.
- Faster Resolutions: When agents have all the necessary context right in front of them, the endless back-and-forth with customers disappears. They can get straight to solving the problem.
- Insightful Reporting: Forget generic reports. Now you can analyze performance based on the criteria that actually matter to your business, not just Zendesk's default settings.
The true magic of custom fields is their ability to turn messy customer conversations into structured, actionable business intelligence. You stop just solving tickets and start learning from them at scale.
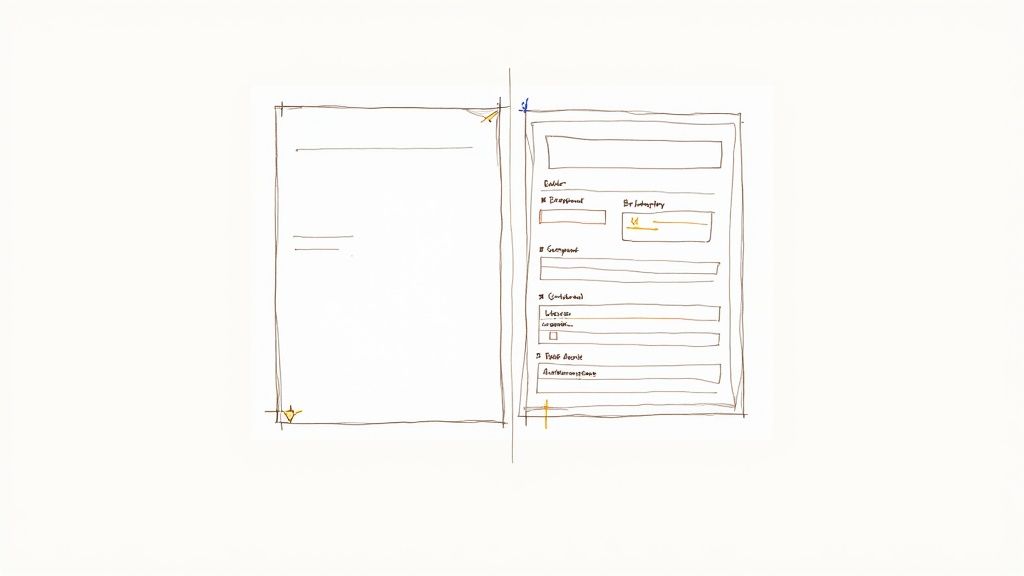
This sketch shows how you might think about building a form, adding specific fields like 'Issue Type' or 'Product ID' to capture exactly what you need.
Each one of those fields becomes a trigger point. It can kick off an automation, get routed to a specific team, or feed directly into your analytics, giving you a clear line of sight from data collection to business improvement.
The Impact on Operational Efficiency
This structured approach brings immediate wins. By simply grouping and filtering tickets with custom data, teams have been shown to cut down agent handling time by an average of 15%. That's a huge boost to your bottom line.
By making sure the right information is collected from the get-go, you take the guesswork out of your agents' day and empower them to work faster and smarter. You can explore more about Zendesk operational gains and see for yourself how data-driven support makes a difference.
Core Benefits of Using Zendesk Custom Fields
To put it simply, adding custom fields is one of the highest-impact changes you can make to your Zendesk setup. The benefits go far beyond simple organization.
| Benefit | Impact on Your Business |
|---|---|
| Data-Driven Automation | Automatically route tickets to the correct teams or agents, assign priority, and trigger specific workflows without manual intervention. |
| Improved Agent Productivity | Provide agents with all the necessary context upfront, reducing the need for back-and-forth and shortening resolution times. |
| Enhanced Customer Experience | Customers provide all relevant info in one go, leading to faster, more accurate solutions and less frustration. |
| Actionable Business Insights | Generate detailed reports based on your unique business metrics, helping you identify trends, spot problems, and make informed decisions. |
| Increased Scalability | A structured data system can handle growing ticket volume far more effectively than one relying on manual sorting and keyword searches. |
Ultimately, custom fields provide the framework for a more intelligent, efficient, and scalable customer support operation.
Choosing the Right Custom Field Type
Picking the right Zendesk custom field is a bit like packing a toolbox. You wouldn't bring a sledgehammer to fix a watch, right? The same logic applies here. Using a generic text field when you really need a structured dropdown can create a mess down the line. Each field type has a specific job, and choosing the right one is absolutely critical for keeping your data clean and your workflows running smoothly.
Your goal is simple: get the exact information you need, with the least amount of friction for your customers and agents. Imagine asking for a "Product Type" but leaving it as an open text box. You'd end up with "Model X," "model-x," and "The X Model"—all for the same product. That kind of inconsistent data makes reporting a nightmare and completely tanks any automation you try to build.
A structured field, like a dropdown, forces everyone to pick from the same list. This guarantees the data you collect is consistent, reliable, and ready for your reports and triggers.
The Core Field Types Explained
Zendesk gives you a solid set of custom field types that cover most of what you'll ever need. While other platforms might offer more bells and whistles, Zendesk’s options are built for practicality. You get up to 10 different custom field types for tickets, which hits a sweet spot between flexibility and simplicity. It covers the essentials like text and numbers but steers clear of the overly complex conditional logic you might find elsewhere. You can see how different platforms compare in various customer service tool comparisons.
Let's break down the most common ones and where they shine.
- Text Field: Perfect for unique, one-off information. Think order numbers, case IDs from another system, or specific error codes. Use this when the answer will almost always be different.
- Multi-line Text: When a single line just won't cut it. This field gives you room for longer descriptions, detailed customer feedback, or internal notes from your agents.
- Checkbox: The classic on/off switch. It’s ideal for simple, binary questions like, "Is follow-up required?" or "Has the bug been escalated?" It's a straight yes or no.
- Dropdown: This is your secret weapon for data consistency. Use it anytime you have a predefined list of options, like "Product Category," "Inquiry Type," or "Priority Level."
Choosing a Dropdown field over a Text field for categorization is one of the single best decisions you can make for your reporting. It standardizes your data, which is the foundation of any meaningful business insight.
To help you decide, here’s a quick look at how these common fields stack up.
Choosing the Right Zendesk Custom Field Type
| Field Type | Best Used For | Example Use Case |
|---|---|---|
| Text Field | Capturing unique, non-standardized information. | Order Number, External Case ID, Tracking Code |
| Multi-line Text | Gathering detailed notes or long descriptions. | Customer's detailed issue description, Agent's internal summary |
| Checkbox | Simple yes/no or true/false questions. | "Is this an urgent request?" "Has the customer been contacted?" |
| Dropdown | Selecting one option from a predefined list. | Inquiry Type (Billing, Technical, Sales), Product Category |
| Numeric | Collecting whole numbers for calculations or sorting. | Customer Age, Quantity Ordered, Number of Users |
| Regex | Validating text that must follow a specific format. | Phone Number, Postal Code, Social Security Number |
Each of these fields serves a purpose, so think carefully about the kind of data you need before you create a new one. The goal is always to make data entry as foolproof as possible.
Advanced Fields for Specific Needs
Beyond the basics, Zendesk has a few other field types that are great for validating information and cutting down on human error.
The Numeric field, for example, only accepts numbers. It's perfect for things like invoice amounts or a customer’s account number because it stops an agent from accidentally typing "five" instead of "5." The Decimal field is similar but allows for decimal points, making it ideal for monetary values or precise measurements.
Another incredibly useful one is the Regex (Regular Expression) field. Don't let the technical name scare you. It's just a way to force an entry to match a specific format. Think of it as a bouncer for your data field, ensuring only the right patterns get in. It's perfect for things like tracking numbers that always start with "TN-" followed by eight digits, or for validating international phone number formats. This makes sure the data isn't just there—it's actually correct.
Putting Your Custom Fields to Work with Automation
Collecting data with Zendesk custom fields is one thing, but making that data work for you is where the real magic happens. This is where automation comes in. Think of your custom fields as the triggers and automation as the action—when they work together, you get a support workflow that practically runs itself.
Instead of an agent manually sorting and assigning every single ticket, you can set up simple but powerful "if-this-then-that" rules. This approach transforms your custom fields from static data points into the engine of an efficient, hands-off support system.
How Custom Fields Fuel Automation
Let's say a customer submits a ticket. One of the custom fields they have to fill out is a dropdown menu you've labeled "Issue Type." The second they select "Billing Question," a trigger you’ve created can instantly fire off. This trigger simply looks at the value of that field and takes action.
This is the core logic behind automation in Zendesk. You’re not just collecting info for the sake of it; you’re using it to make smart decisions the moment a ticket arrives.
A well-designed custom field is like a signpost. It tells Zendesk exactly where a ticket needs to go and what needs to happen next, removing the guesswork for your agents and speeding up the entire process.
This flow is a great way to think about building fields that are perfect for automation.
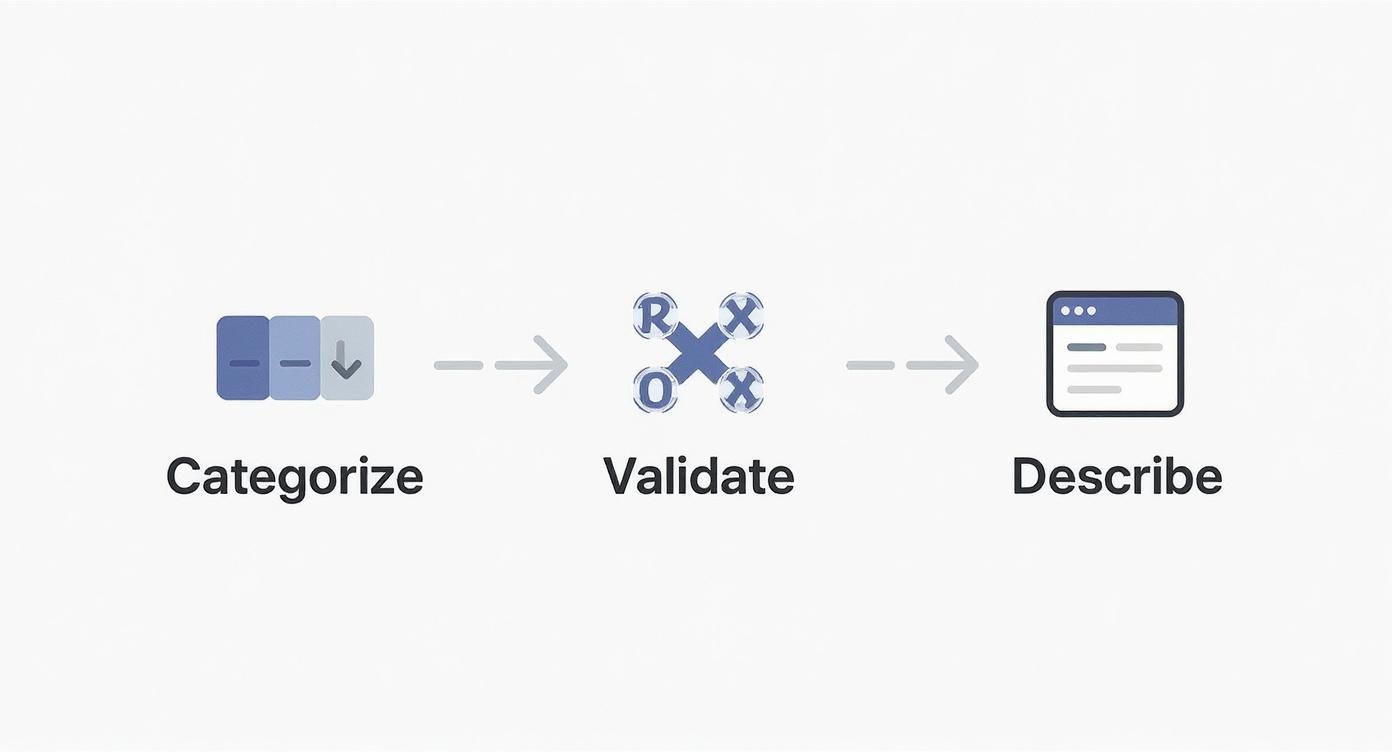
It all comes down to categorizing the data with structured fields, validating it to make sure it's accurate, and then adding specific descriptions. This gives you clean, reliable data that your automation rules can easily understand and act on.
A Practical Automation Example
Let's walk through a common scenario. Imagine a software company wants to send bug reports straight to the engineering team and new feature ideas over to the product team.
Here’s how they could set it up with one custom field and one trigger:
- Create a Custom Field: First, they’d create a dropdown field called "Ticket Type" with options like "Bug Report," "Feature Request," and "General Question."
- Build a Trigger: Next, they’d create a new trigger in Zendesk, which is just a set of conditions and actions.
- Set the Conditions: The trigger would be set to run only when:
- A ticket is created.
- The "Ticket Type" field is Bug Report.
- Define the Actions: When both of those conditions are met, the trigger automatically does the following:
- Assigns the ticket to the Engineering group.
- Sets the priority to High.
- Adds the tags bug_report and triage_needed.
- Pings the #engineering-alerts channel in Slack.
Just like that, every bug report gets categorized, prioritized, and delivered to the right people without anyone lifting a finger. Automating this one workflow can slash the process time by as much as 80% by getting rid of the manual sorting step. Now, imagine applying that same logic to all your different ticket types—the efficiency gains really start to stack up.
How Different Industries Use Custom Fields
This is where the rubber meets the road. The real power of Zendesk custom fields isn't just in the theory of data collection; it's in seeing how they solve tangible, everyday problems for different businesses. Once you see them in action, you can start building a blueprint for your own setup.

Every industry has its own language and its own unique challenges, from managing client intake to tracking property listings. Custom fields are what let you bend a generic support platform into a purpose-built hub that speaks your business's language.
Real Estate Agencies
For a real estate brokerage, a vague "I'm interested" message just doesn't cut it. To close deals, agents need specifics—and they need them fast—before a competitor swoops in.
This is where Zendesk custom fields become a lead-capturing machine.
- Inquiry Type (Dropdown): Is the person "Buying," "Selling," "Looking to Rent," or asking about "Property Management"? This one field immediately tells an agent what conversation to have.
- Property ID (Text Field): Adding the specific MLS or listing number connects the ticket directly to the property in question. No more guessing games.
- Urgency (Dropdown): Gauging intent is everything. Options like "Just Browsing," "Ready to Tour," or "Wants to Make an Offer" help agents spot the hot leads.
Once these fields are in place, you can build a trigger that automatically routes any ticket marked "Wants to Make an Offer" straight to a senior agent with a high-priority flag. That's how you make sure a commission never slips through the cracks.
Law Firms and Legal Practices
Law firms live and die by precision, confidentiality, and case-specific details. A single mix-up can have serious consequences, and every minute spent on administrative chaos is a minute not spent on billable work.
Custom fields bring that much-needed order to the chaos of case management right inside Zendesk.
In a legal setting, custom fields act as the digital equivalent of a meticulously organized filing cabinet. They ensure every piece of communication is correctly labeled and associated with the right case from the very first interaction.
Here are a few fields that are absolute must-haves for law practices:
- Case Number (Text Field): This is the unique identifier that ties every email, call, and note back to the correct legal matter.
- Matter Type (Dropdown): Quickly categorize the legal issue, whether it's "Family Law," "Corporate Litigation," or "Estate Planning."
- Client ID (Numeric): This field connects the ticket to a client's record in the firm’s practice management software.
With this structure, paralegals and attorneys can see a case's entire communication history in one place, saving precious time and reducing the risk of errors.
Clinics and Healthcare Providers
Healthcare providers are constantly juggling a high volume of patient inquiries, from appointment requests to complex billing questions. Accuracy and speed are non-negotiable here; a slow response can directly impact patient care.
Custom fields are the key to triaging patient communications effectively and safely.
- Appointment Status (Dropdown): Using options like "New Appointment Request," "Reschedule," or "Cancellation" can kick off automated workflows, like updating the clinic's calendar.
- Patient ID (Numeric): A simple numeric field can securely link an inquiry back to a patient's electronic health record (EHR) without exposing sensitive data in the ticket subject.
- Inquiry Reason (Dropdown): Segmenting tickets into clear categories—like "Billing Question," "Prescription Refill," or "Follow-up Care"—ensures they land on the right desk immediately.
This kind of setup means urgent medical questions get flagged instantly while administrative tasks are handled by the right staff, letting clinical teams focus on what they do best: caring for patients.
Connecting Zendesk to Your Other Business Tools
Your support desk isn’t an island. It’s more like a busy port, with information constantly flowing in and out, connecting to every other part of your business. The data you collect with Zendesk custom fields is gold, but its real value is unlocked when you share it with other essential tools, like your CRM or marketing platform.
Think of it this way: when your tools don't talk to each other, you create isolated pockets of information, or "data silos." This forces your teams to constantly jump between different apps just to get a complete picture, wasting time and opening the door for human error.
Creating a Universal Language for Your Data
The secret to bridging these gaps is something called field mapping. It’s simply the process of telling your systems that a specific field in Zendesk means the same thing as a field in another tool. For example, you might map your "Lead Source" custom field in Zendesk to the "Lead Source" property in your CRM.
Once you do this, you’ve essentially created a universal language for your customer data. Now, when a support ticket arrives from a lead who came from a "Webinar," that information automatically pops up in your CRM. Your sales team gets the full story on that lead's journey without ever having to leave their own dashboard.
Well-planned field mapping ensures every team works from a single source of truth. It breaks down departmental walls and gives everyone a complete, 360-degree view of the customer relationship, from the first marketing touchpoint to the latest support ticket.
This seamless flow of information is what builds a truly connected customer experience. In fact, studies on workflow automation have found that businesses with well-integrated systems see a 20-30% reduction in operational costs, mostly because they've cut out all the tedious, manual data entry.
Planning Your Integration Strategy
Before you start connecting your platforms, take a step back and plan. A messy integration can cause more headaches than no integration at all. The goal is to keep your data consistent and avoid confusion across your systems.
Here’s a simple game plan to get started:
- Identify Critical Data Points: Figure out which pieces of information are most important to share between teams. You don't need to sync everything. Focus on the fields that provide the most context, like "Account Type," "Customer Since," or "Product Tier."
- Audit Your Fields: Take a look at the custom fields you have in Zendesk and compare them to the fields in the other tool (like your CRM). Do they match up? If not, you might need to create a few new custom properties in your CRM to make sure the Zendesk data has a place to land.
- Define the Data Flow: Decide which system is the "master" for certain types of information. For instance, your CRM should probably be the ultimate source for contact details, while Zendesk is the expert on ticket-specific data.
By mapping your Zendesk custom fields with a clear plan, you build a powerful, interconnected web of tools that gives every team the context they need to do their best work.
Keeping Your Custom Fields Clean and Organized
As your business grows, so does your collection of Zendesk custom fields. It’s easy for things to spiral out of control. What began as a neat and tidy system can quickly become a tangled mess of confusing, outdated, or redundant fields. This kind of chaos doesn't just confuse your agents—it pollutes your reporting, making it nearly impossible to trust the data you're pulling.
Think of your custom fields like a shared workshop. If everyone throws their own tools onto the bench without any organization, it’s not long before you can't find the right wrench. A solid governance plan keeps this from happening, making sure every field has a clear purpose and a home. This isn't about creating rigid, bureaucratic rules; it's about keeping a clean, efficient system that everyone can actually use.
Establish a Governance Plan
The first step is to create simple, clear guidelines for managing your fields. This doesn’t have to be some hundred-page manual. Just a basic framework can make a world of difference.
- Use a Clear Naming Convention: Get into the habit of standardizing how you name fields. For instance, you could start all user-related fields with "User_" or all billing fields with "Billing_". This simple trick makes fields so much easier to find and understand at a glance.
- Create a Data Dictionary: This sounds more complicated than it is. It's really just a simple document that lists every custom field and explains what it's for. It should answer what the field does, who uses it, and what kind of information goes into it.
- Set Clear Ownership: Decide who gets to approve new fields. Having a single person or a small team act as a gatekeeper prevents people from creating duplicate or unnecessary fields whenever they have a whim.
Control and Audit Your Fields
Controlling who can create and modify fields is fundamental to staying organized for the long haul. Zendesk’s custom roles are perfect for this, letting you give field modification permissions only to specific administrators.
Limiting who can create fields is the single most effective way to prevent bloat. It forces a conversation about whether a new field is genuinely needed, which is absolutely critical for a scalable setup.
This isn't just about tidiness; it directly impacts your team's efficiency. In larger companies, organizations using Zendesk’s custom roles and sandbox environments have seen a 44% faster onboarding rate for new support agents. When you set precise permissions on custom fields, new hires can focus only on the data that matters for their job. You can dig into more of these insights on custom objects.
Finally, put a recurring audit on the calendar—maybe quarterly or twice a year. Go through all your custom fields and ask one simple question: is this still being used and is it still valuable? If the answer is no, archive it. This simple routine will keep your Zendesk instance clean, efficient, and useful for years to come.
Common Questions About Zendesk Custom Fields
As you start diving into Zendesk custom fields, you'll naturally run into some practical questions. Let's walk through a few of the most common ones that come up when people are trying to get their workflows just right.
How Many Custom Fields Can I Create?
This is a big one, and the answer is simple: it depends entirely on your Zendesk subscription plan.
Plans like Suite Team will give you a certain number, but if you're on a higher-tier plan like Suite Enterprise, you'll have a much higher ceiling for custom ticket, user, and organization fields. Your best bet is to always check the official Zendesk documentation for your specific plan's limits. This way, you won't get halfway through a project only to discover you've hit a wall.
Can Custom Fields Be Conditional?
Yes, but with a small catch. Out of the box, Zendesk's native support for making one field appear based on another's value is pretty basic.
However, this is where the Zendesk Marketplace really shines. Apps like the 'Conditional Fields App' are built specifically for this. They let you create dynamic forms where fields show or hide based on what a user selects, which is a lifesaver for cleaning up complicated ticket forms.
How Do I Report on Custom Field Data?
All that valuable information you're collecting isn't just stuck on the ticket. You can pull data from any custom field directly into Zendesk Explore, the platform's powerful reporting tool.
This is where the magic happens. You can build reports and dashboards that slice and dice your ticket data using your custom field values. It’s hands-down one of the best features, letting you uncover insights that are completely unique to your business.
Ready to stop missing calls and start converting leads 24/7? CallCow provides an AI voice agent that answers calls, books appointments, and integrates directly with your business tools. Set up your free AI agent in under five minutes.